RESTORED HARDWARE CHRISTMAS TREE diy:
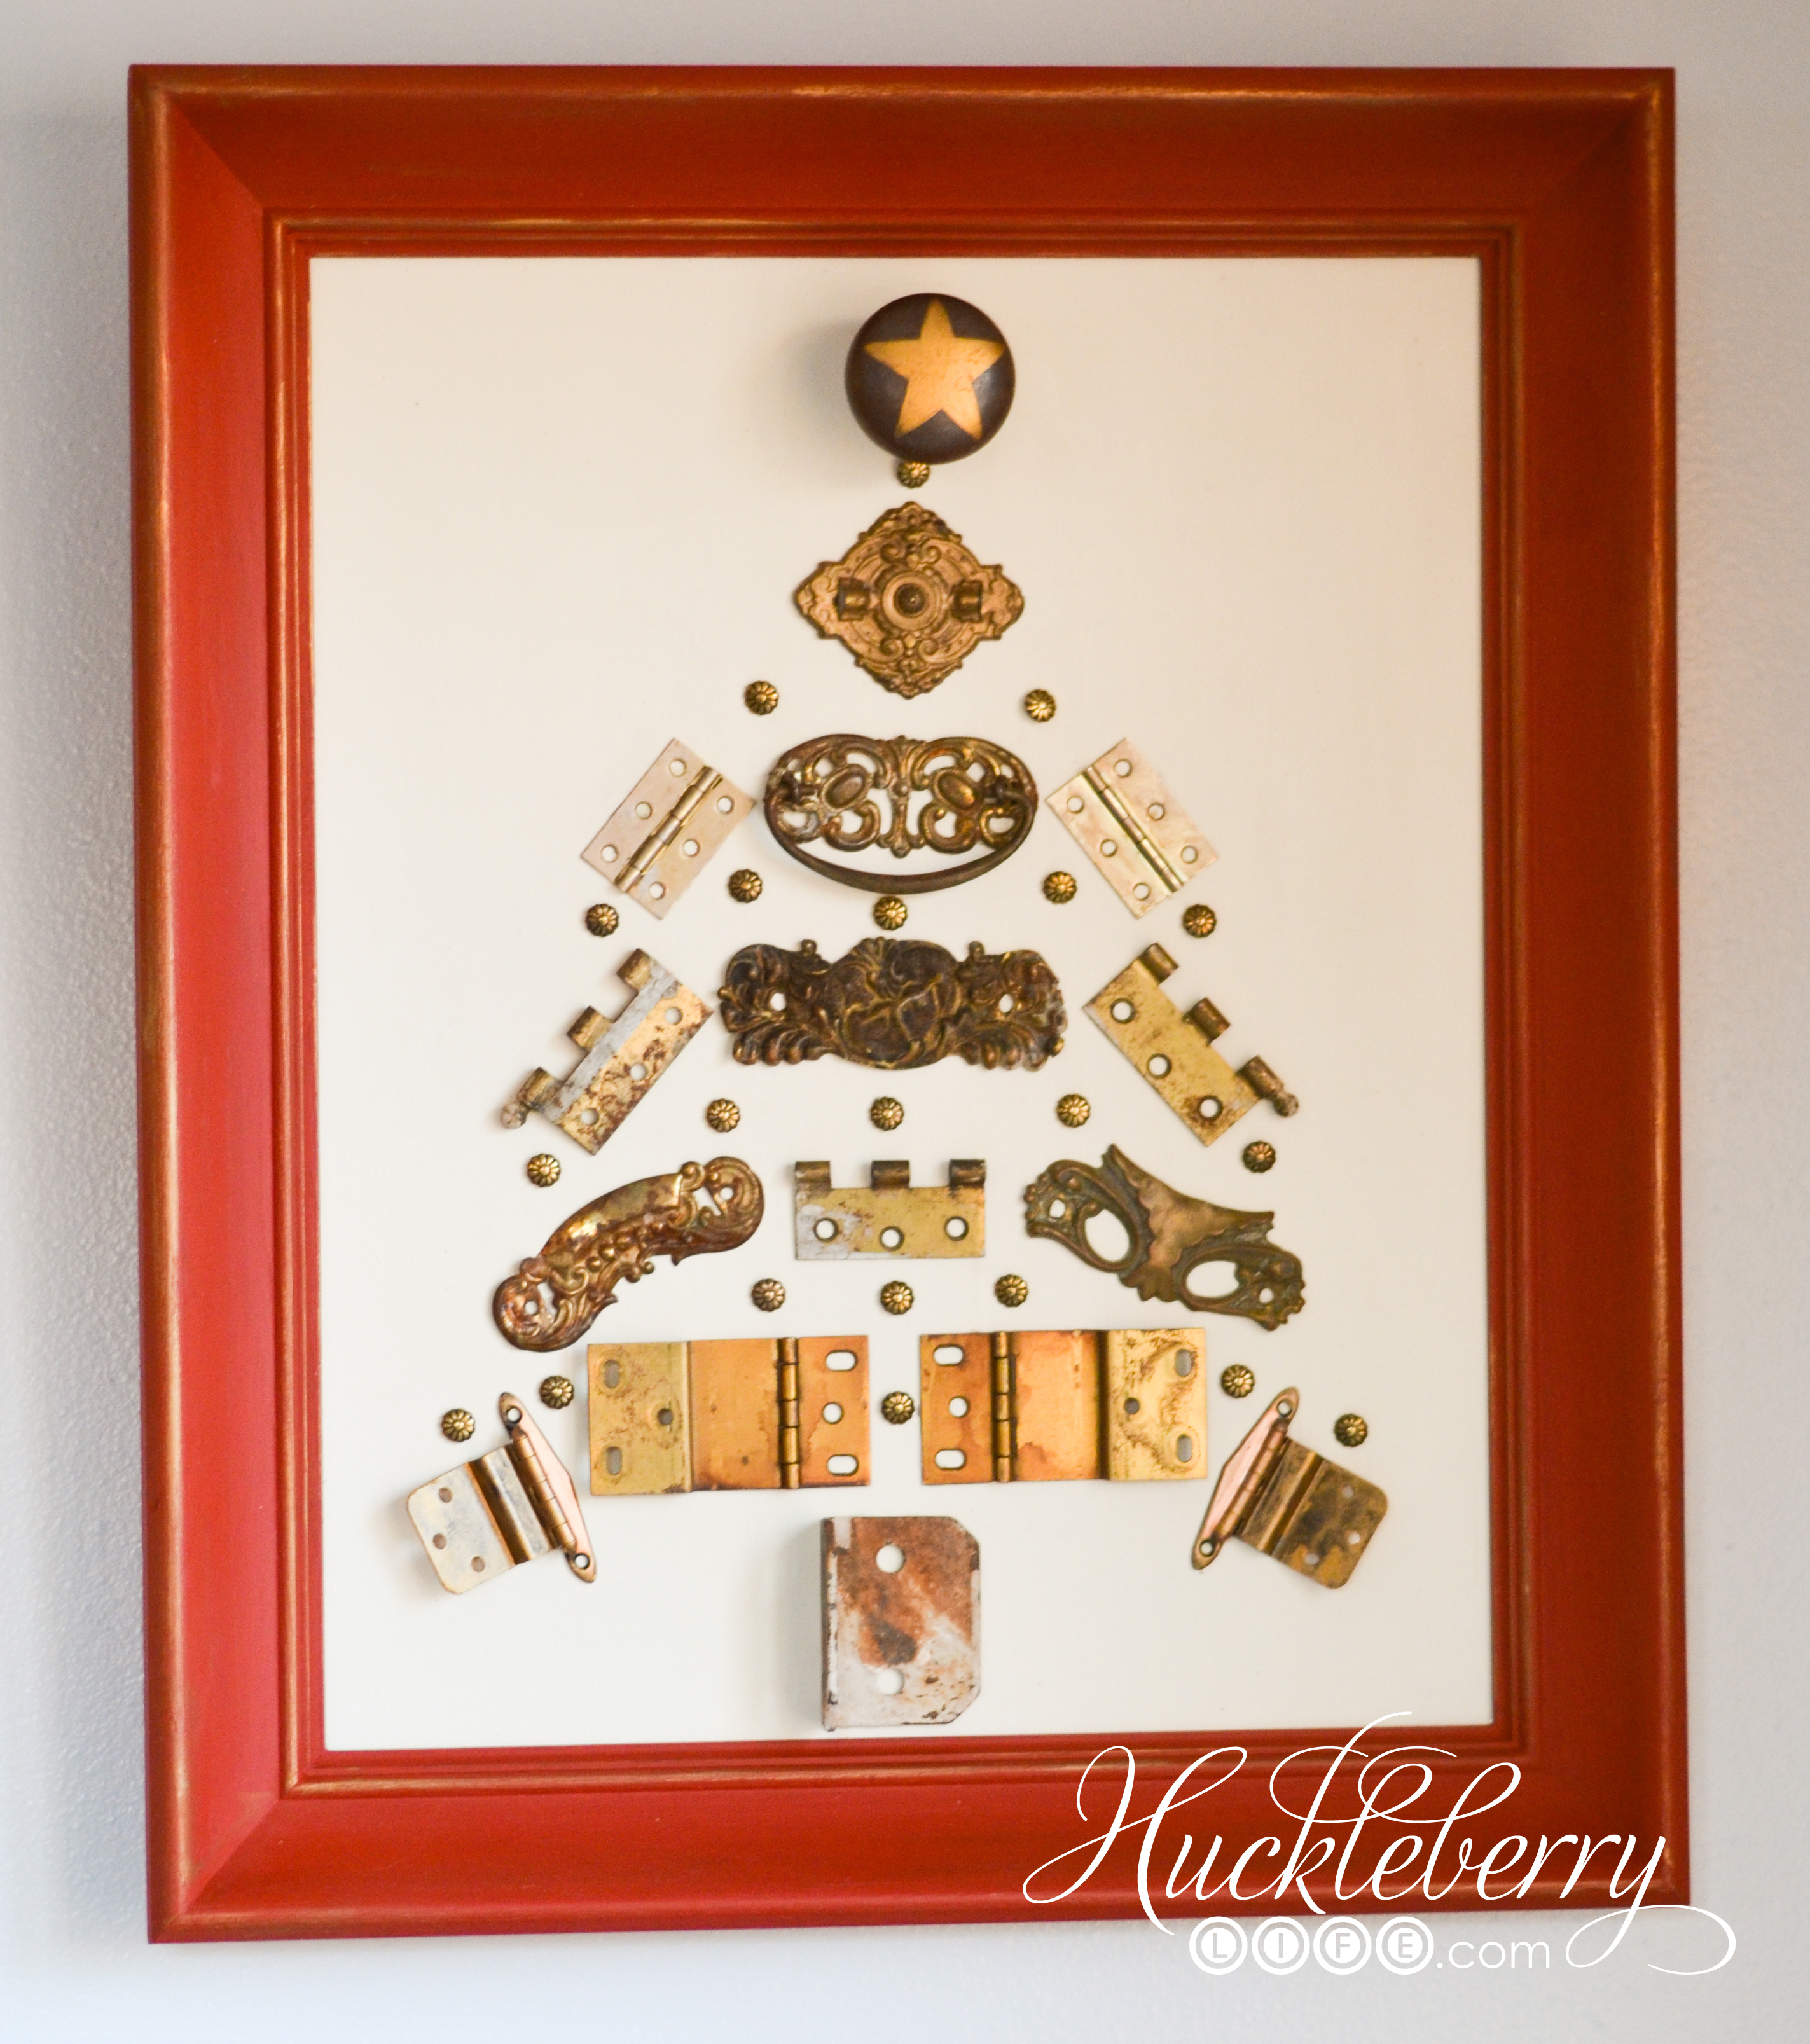
Whew! So so so happy to have this RESTORED HARDWARE CHRISTMAS TREE done and off my mind! I started collecting “stuff” for this project last year. Most of the hardware was found at a flea market. I was determined that I would finally get this project done this year….and here we are 5 days before Christmas and it is hanging on the wall! So, if you love this idea and want to make one for yourself go ahead and PIN it and start collecting now. Everything for this project was thrifted. There’s something about taking random “junk” and making something fun and unique that just makes me happy.
THE “STUFF” I COLLECTED:

I found this 16×20 frame at a thrift store for just a few bucks. It is big and chunky and I LOVE IT!

My husband cut a scrap piece of wood to fit in the back. I went back and forth on colors for this project for WEEKS! Originally I thought maybe the hardware would “pop” better on a dark background…but didn’t love the idea of a light frame. Then I thought about doing Navy with an Old White center. But I had just done similar colors on my Framed Evergreen Ice Skate. Time to mix it up. I LOVE Annie Sloan chalk paint but didn’t have any red. While I was shopping for a new necklace the other day at The Painted Ladies, who carry Annie Sloan Chalk Paint, I grabbed a sample size of Annie Sloan Emperor’s Silk. I love the color and have plenty left over for another project.
EMPEROR’S SILK:
One coat of the paint looked nice and showed the wood grain, but I decided on two coats. Distressing is usually my go to, but I decided not to this time and just used a little Rub’N’Buff in gold on the frame details after a coat of clear wax.

I decided to do the background in Annie Sloan Old White. I went back and forth on distressing or not distressing the background but ultimately decided against it because I didn’t want it to take away from the hardware. Some of the hinges were new and really shiny so I used some Rub’N’Buff on them so they would match the rest a little better. If you don’t know what Rub’N’Buff is you should look it up. It’s just a wax paste but does AMAZING things. Check out how we used it on our Steampunkins! It took a while for me to get all the hardware placed where I liked it. I had originally planned on doing all the hardware in straight lines and decided at the last minute to angle the end pieces and I love the result. It looks more “tree” like.

I used E6000 glue to attach the pieces to the background. E6000 is a super strong glue that I find myself using often.

GETTING EVEN MORE CREATIVE:
Some of the hardware wasn’t quite laying flat so we improvised with some canned goods to hold them in place while the glue dried over night. 😉

For the star on the top I used Rub’N’Buff and painted it on the old door knob with a small paint brush. The door knob is heavy and stayed well with the E6000.

SOMETHING IS MISSING:
After I let everything dry overnight I thought it was done and hung it on the wall and stared at it for a minute. It needed something more!

I ran to a couple local thrift stores hoping to find some cool vintage buttons but they had none. What I did find were these cool little upholstery tacks for 20 cents! Score! Wire cutters worked great to snip off the tacks and since they were light I just used hot glue to attach them.

Looks kind of like little ornaments hanging on the tree.

One final little tip. When I was adding the gold Rub’N’Buff to the frame I accidentally got some on the Old White background. For a minute I panicked, but then I remembered that it would come off easily with a rag and a little more clear wax. The background already had a coat of clear wax so it came right off. Yay! If it wouldn’t have come off I could have easily added a little more paint and covered it right up, but I’m glad that I didn’t have to because this was much easier. I don’t have a picture, but here is one of my BIG helper, messy face and all.

I hope you liked this tutorial for our RESTORED HARDWARE CHRISTMAS TREE and that it got your creativity flowing! Let us know if you create something similar in the future.


